Friday, July 20, 2012

Combustion and Creativity - Salt Soda and Wood

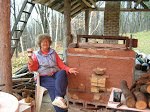
Well I can relax now that I have delivered all my pots for a show that I am taking part in with two other potters called "Combustion and Creativity - Salt Soda and Wood". The wood part is me. The salt part is Tim Storey who does amazing things with hand building - his creations - many with animal themes in his unique style are widely collected.  http://www.madawaskastudiotour.com/studios2010/storey/storey.html    
The soda part is Dan Hill who does great things in cone 6 soda.
 http://www.hillpottery.com/DanHill/index.html
He also give workshops in soda firing using not only his large soda kiln but also a converted electric to soda kiln. So if you are in Barry's Bay, Ontario, sometime between July 20 and Aug 26 be sure to stop by South of 60 (railway station) and see the exhibit.
(Not sure why I am getting white sections in the write up - I can't seem to remove them even if I start over in a new blog section.)

Saturday, June 9, 2012

Another Step Up the Mountain - But Where is the Peak?


More from those old Ceramics Monthlies. The Feb 1994 issue had a super article by Steven Hill titled "Don't Put the Flames Out" where he talks about his inspirations and how important it is to continue to develop your work over a lifetime no matter how great your pots are - otherwise they will lose their vitality. Steven finished the article with, "A favourite analogy of mine is of a mountain climber slowly making his way up toward the peak, dreaming of the summit. I hope to never reach that peak, because from that point on, it's a long downhill slide".  My father who was Austrian instilled in me a love of mountains so Steven's analogy about making pots and mountains really hit home.

I've been thinking about Steven's quote for some time now - I seem at times to have lost the path to the peak as I tend to wander around a lot. Sometimes I think I am going downwards as I revisit past work but I think I eventually get back on the path - but the path is hard to see as my work seems to evolve in multiple directions and not always with success. However I think the important part is to always keep on trying.

It's a bit hard to see but on left - bottom corners paddled up a bit  Right - bottom corners left flat
I used to make all my slab vases had a flat bottoms. When I started making smaller ones, I would paddle the bottom and the side - with rounding up the sides a bit - giving the pots a lift - having picked that up in Vince Pitelka's workshop at MISSA in 2011. Now I started doing that on all my large slab vases as well and what a difference it seems to make  - more life, elegance, lightness etc...etc. Now it seems obvious yet it took a few years to work out and develop. Another small step up the mountain.

I think as well it is very important to get impartial knowledgeable feedback - so I like to conclude that analogy with this - like many mountaineers on the really big peaks - you can't do it alone. Fusion - the Ontario Clay and Glass Association is offering their second mentoring program and hopefully I will get accepted as I find that I really miss and need that help up the mountain.

Friday, June 8, 2012

Train Wreck - Sixth Firing of the Newfoundout Train

What a train wreck - and unfortunately there were few survivors! I had replaced the front 1/3 of the inner layer of insulating bricks with hard brick, hoping that this would even out the temperatures in the stacking chamber. Instead what I got was a wreck  - the front half of the kiln under fired and the tail end totally over fired. Cone 10 was down in the front section but cones are rather unreliable in my kiln where the flames are so unidirectional. In the tail end cone 11 ended up in a puddle.

The front section apart from a few pieces were loaded with MD shino and Wirtz shino as liner. The pots ended up blistered bubbled and cratered - both outside as well as inside!

MD Shino - super crusty disaster - top shelf front section
So what happened?

1. Did the flames over fire the shinos and cause the blistering? I didn't think that shinos could over fire - they seem to be able to take a lot of heat - plus some of the liner glazes were underfired in that section - indicating not over-firing.

2. Was everything under fired and so the glaze did not have time to smooth out? I did not think that shinos do much bubbling during melting - but I could be wrong as they definitely bubble over other glazes. But on some pots the side away from the flames had some smooth melted surfaces. I would assume that the side away from the flames would remain cooler.

3. This was the first time that I had used some calcined kaolin and ball clay to replace some of the clay so as to reduce crawling. Did that affect the glaze? Did I mix up the glaze wrong? I used the same glaze on other pots in the middle section and the shino there was good though still a bit underfired in parts so that was not the cause.

4. Did I over reduce? - I was trying for lots of carbon trapping - so threw in everything at the start to build up soot - lots of pine boughs with needles on them as well as lots of little twigs on top of the logs.

5. Did reduction cooling occur? - not sure what happens with shino in reduction cooling, but there was some reduction cooling I think as the ember pile was still huge when I clammed up the kiln.


The carbon trapped bowl on bottom right was glazed just the day before firing. The rest up to a week before and loaded about a week to 3 days before. All the same glaze - MD shino - except for one white liner that was a bit underfired.

6. The front section pots were placed in the kiln anywhere from 5 to 3 days prior to the firing and there was rain during that time. The pots were protected from the rain as the kiln is under a shed roof - however it is located high in the Opeongo mountains where we often drive up into the fog. The few sides of pots that were away from the flames were smooth and these would have been protected from the prevailing winds (moisture) as well. I think that the pots reabsorbed moisture from the moist air and the glaze blistered up very slightly - not enough to be readily visible - as I had repositioned some of those pots just prior to firing and I would have noticed that something was wrong with the glaze.
Something like this happened once before with a MD shino pot that I had left out in the open - it was very foggy overnight and the next day the raw glaze had bubbled up. I fired it but the bubbles did not smooth out and these pots reminded me of that same effect.
Tray in top layer for front section - MD shino - all bubbled .

Small smooth sections on two bowls - sections were facing away from the flames.
As well I had added more shino glaze on the outside of two pots (see above) just prior to firing and the side away from the flame was again smooth. This would have countered any blistering that could have happened due to rain/fog moisture reabsorption.

One of the survivors - a rock wall vase - but still in critical condition. The middle section with this pot in it was loaded just the day of the firing and no blistering occurred, though some of the rocks which bubbled were in the front section and thy were glazed at the same time.

So I think I will have to take out the hard brick and put back the insulating bricks and make sure that I load the shinos just prior to firing.
Pots I can make more - but the stack of dry wood was diminished and that is harder and less fun to replace.

Monday, March 26, 2012

Excavations from the Past


I love looking through old Ceramics Monthly magazines – even if they are decades old. Recently a former member of our guild donated some old ones to us and I have spent the winter months happily engrossed with images from the past. This photo of a jug by Sheila Casson from Sept 1993 caught my eye – very elegant and unusual. Not sure how it would pour - though with that long spout, probably very elegantly.

Jug by Sheila Casson - from Ceramics Monthly 1990's 
Individual Medalta creamer found in crawl space
When investigating a sink leak in the crawl space under the Potters' Guild, I found that our leaking plumbing had eroded some of the sandy soil and had exposed this little ceramic creamer. I remember the days before plastic creamers. It was always a little individual ceramic or metal jug of cream that was placed with your tea or coffee. The space where we have our Guild used to be a restaurant until about 1970 and so the creamer must have come from it – made in Medalta even!
So I decided to make some miniature ones –  little creamers but ala Sheila Casson - sort of. You throw a cylinder, cut away part of it in a semicircle and fold over the two ends.
My three small jugs ala Sheila Casson  - sort of.


Saturday, March 24, 2012

Have Mug Will Travel

My husband and I always have a full travel mug of our favorite hot beverage when we set off in our car – milky tea for my husband and lately hibiscus tea with honey for me. Unfortunately I find that most travel mugs even if made of metal because of their plastic lids tend to impart their taste to the tea and I have long thought of making a ceramic one – but how to make a cover to stop the beverage from spilling? I do not like the look of the commercial plastic covers that you can buy as an accessory from ceramic suppliers - plus being plastic there is that plastic taste again.

When I was visiting a gallery in Banff a month ago, I was told about a potter who makes great travel mugs – located in Canmore a town near Banff. Unfortunately we were going in the opposite direction so did not get to visit, but the gallery salesperson brought up the website site ----- and they really did look great – especially clever idea for the cork lids and the little sippy holes.

Original design travel mugs by John and Katie Borrowman of the Cabbage and Kings Pottery
in Canmore Alberta.
A few days later we arrived at our son’s home in Kimberly, BC and in searching for some cups in his cupboard I saw that he had two of those travel mugs! I asked him how he liked them – well he did not use them as he never uses a travel mug. I never did get a chance to try them out in the car, but they handle well, though heavier naturally than the plastic or metal ones.
Great mugs -- so kudos to John and Katie Borrowman at http://www.ofcabbagesandkings.ca/


Tuesday, December 20, 2011

The Good, the Bad and the Ugly - Carbon Trap Shino

It's been a great year - with lots of gas firings and three wood firings as well as my workshops at MISSA.  I have been really interested in the carbon trapping shinos and have been using Malcolm Davis's recipe. I was very sad to learn of his recent death. I have read the presentation that he made at NCECA last year and what a wonderful career he had! Someone who we can really admire. If you want to read it - here is the link:
http://www.nceca.net/static/documents/MalcolmDavis.pdf  It's too bad that the slides that he used in the presentation are not available as well.
So here are some pictures of my Malcolm Davis Shinos - with and without Red Art. The one with Red Art is used on porcelain - with no Red Art you do not seem to get the orange colours on porcelain.
The Good: MD Shino without Red Art - Dan Hill's lithium slip with cobalt was first sprayed and then wiped off the the trees. Then sprayed with MD Shino without Red Art. Then the trees were waxed. The carbon trapping at the edges of the tree trunks is really great. I've been trying to replicate but so far with no success! Fired to probably cone 12 - 13 in my June 2011 firing.
Since I use  both B-mix - a porcelaneous stoneware and B-Mix for Wood Fire ( I presume it has something added to aid flashing) I tried both MD Shino with and without Red Art as I was not sure which one to use. In the gas kiln there seemed to be little difference between the two types on the above clays. However in the wood kiln the MD without Red Art seemed to get very little orange colour and the one with, seemed to go rather dark, more brown than orange. Maybe the ashes are washing out some of the orange?  So not sure which MD Shino to use from now on.

The Good: DH lithium slip sprayed on right and bottom as well as rim of bottle. Sprayed with Wirtz Shino  and then poured on  MD Shino on right shoulder. You can see how the lithium slips tends to bubble through. Same firing as above - in fact pots were next to each other. There was great carbon trapping where the shino was thicker due to the poured layer on the shoulder. Unfortunately this pot cracked on the bottom seam.

The Good: Dark stoneware clay - one half poured with MD Shino with Red Art on left and the other half without Red Art. Waxed out design. Got great carbon trapping but no orange hues.

The Bad: Used again Dan Hill's lithium slip with cobalt and then sprayed with MD Shino without Red Art. Sprayed a light coat of MD with Red Art over the upper area of the trees and people. Appliqued areas then waxed. You can see that it went orange there, but the bottom part was totally white - totally oxidation I guess. My end of Oct firing. The colours are not bad - but not what I was looking for in a Shino.

The Ugly: MD Shino without Red Art - and without any lithium slip. Appliques were waxed out. Really ended up washed out. The ash deposit on the left removed what little orange blush that there was. I have to remember to take that into consideration when I load the kiln and make sure that the ash works with the design and not against it.


The Ugly: Lithium slip on top part and then wiped off the appliqued areas. Sprayed with MD Shino with Red Art - plate cracked but you can see that the orange on the left is not a vibrant colour. On the right there is quite a bit of ash deposit. Again the trees were waxed out, but no carbon trapping either.