Sunday, September 11, 2011

Take a Nap to Tap into Your Creativity - MISSA 2011 Part 1

MISSA - The Metchosin International Summer School of the Arts located at the Lester B. Pearson International College just outside of Victoria BC has to be one of the most inspirational summer schools imaginable. Not only is the location fantastic, but the quality of the teachers is world class so it attracts a lot of serious students.

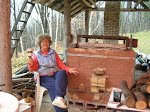
It is always held in the first two weeks of July and this year I signed up for workshops with Nick Joerling (1 week), Steven Hill ( weekend) and in the second week - handbuilding with Vince Pitelka. A trio of rock stars - all were amazing! You also get to meet other artists from other disciplines and in the evenings there are slide shows by the workshop presenters - all very inspiring and applicable to other disciplines!

Path to Auditorium at MISSA
View from the Pottery Studio
In the creative writing workshop with Sarah Selecky, http://www.sarahselecky.ca/ the class was instructed to take a nap every afternoon to recharge their creativity - evidently when you first wake up - before you mind fills up with the days plans, problems etc, - if you just let your mind drift freely into your project - that is supposedly one of your most creative times. I guess it is just like waking up and coming up with a solution to a problem during the night. I have been trying to think about my pots when I first wake up in the morning - though most mornings the days problems and issues intrude pretty quickly.

Another thing that I learned from one of her students was that they were not to use a computer for their first drafts, but to write by hand, forming each letter slowly. Evidently writing by hand activates the creative part of your brain. Very applicable to pottery I think. I'm always drawing, sketching, often the same thing over and over, imprinting the image into my brain, with just subtle differences and as I turn the pages the images change into something that perhaps I can use.

The writing students says all this worked. I think I would have a hard time doing the first part - taking a nap - as I wouldn't want to miss even a moment of that fabulous time at MISSA.

Tuesday, July 19, 2011

Rims and Feet

It's been about 10 months since my last post. I have been making items for the marketplace - nothing very exciting - no new directions or techniques and I have just not had the energy to write any of it up.

It's just in the last few months that I have started handbuilding again. I find that it's with handbuilding that I get really excited about my work. I have never been very pleased with the bases of my slab built pots - I felt they were very weak - needed to be stronger and better delineated. Same with the rim - though I have had some success with strenghtening them by adding extra coils or clay strips to them.

This time I tried rolling down the rim with a brayer to make them thicker. I had tried this earlier with a small vase with some success. However with my larger pieces this is hard to do as I never really know what final form the rim will take until I have finished all the appliques and by then the rim is usually rather dry - so I have to keep spraying it with water to keep it wet.


"What If the Snake Had Eaten All the Apples?"
This time I managed to roll the clay down enough to make a rather neat delineating line all around the rim and down one edge. The pot is called "What If the Snake Had Eaten All the Apples?" It was fired in the third firing of my wood kiln and the matt stony yellow, and Hannah blue and ochre ashes all turned glossy with black carbon trapping in some parts - rather muddy colors as somehow I managed to overfire my wood kiln!
Looking at the pictures now, I feel that the rim and base are still a bit too delicate - so next time I need to concentrate more at making them more visually stronger.


Back - the blue ash turned black, maybe some carbon trapping as there was very heavy reduction

Friday, September 3, 2010

Chug Chug - The Train Pulls In

I love the sound my train kiln makes right after stoking the bourry box. The flames gulp air through the
primary air holes in the lid making the characteristic chugging sound - definitely a sign of reduction.

This time I had lots of reduction in the top half and it seemed to be along the whole length - though it varied, just like the flame signs were one directional. The Shaner oribe turned red, the VCAA green turned a purplish.
I had made two small appliqued vases to test out how they would react to the flames and to the soda.
In the wood only section I had used the watercolour green to highlight the applique then rubbed off and gave it a light spray with bone ash glaze. The bone ash did not react well with the ash - going a grey colour and a sugary white where hit directly.
Bone Ash glazed with a spray of watercolour green on dresses. Left side faced directly into the flames and so turned very grey. Right side had more of a warm colour where it was protected from the ash.

In the soda section the pot had Dan Hill's slips - blue, blue green and rutile, with a light spray of Hanna blue ash on the right upper side. The back had some nice blushing.


Jar from throat arch - lid no longer fits as it had sealed with ash when it got knocked sideways.

I had made some large bottles as it was the quickest way to fill up the kiln. I was a bit worried that it would block the flames but that did not seem to be the case though the large covered jar in the throat arch got knocked over so that may have helped open up the flame path.
 
The flat topped orb - had some nice flashing and crystal development on the top - so the slow cooling helped. It was on the bottom just behind the throat arch. It had Aerni colour active blue and brown slips and then glazed with Hanna blue and ochre fake ash glazes with over sprays of rut/GB and Ti/GB.
 
 
The tall bottles were side by side at angles to each other. The Hanna ochre ash glazed one had a bit too much olive green colour where it was hit with a lot of ash. The other one was glazes with mal Davis shino - but was too thin - as no carbon trapping. However the colours were a very warm orange an reds. Not very professional photos as I did them outside and did not have a large enough back drop.


Second Woodfiring in the Newfoundout Kiln

Although it was two months later than planned, I finally managed to get in my second woodfiring at the end of August in my train kiln. I had made a few changes - added an inner row of hard brick on the top on the pot chamber, used two hard brick slabs - 12 x 24 x 2 1/2 for the first part of the kiln roof,- all of that adding extra mass.

First three wood fired stoke sections- mostly glazed
I also used extra insulating bricks on the lid - as well as an old kiln lid that was 4 inches of insulating brick, as well as a fibre blanket and some old fibre sections wrapped in aluminum foil. I also tried to use soaps where ever possible and added extra bits of shelves, bricks, etc in the stacking to also add mass - all of these to slow down the heat loss - not only between stokes but for cooling as well.

Lid covered with lots of insulation - 6 1/2 inches of insulating bricks near the chimney.
Cone 11 was flat near the top in the first stoke hole and cone 9 starting on the floor near the flue exit. This was much better than the first firing. The firing took 13 1/2 hours and then two hours to burn down the coals before clamming up. All in all very manageable for one person to fire. Unfortunately the clay boat holding cone 012 exploded, resulting in shards in many bowls.


I also used about 1/2 pine and cedar instead of just ironwood which in my first firing had caused too many coals to build up.
This time I glazed most of the pots except for some in the last two stoke sections where I added soda. I placed some small dishes with soda ash when stacking as well as soda/sawdust burritos- the burritos did not work very well as there was still a lot of soda ash left on the floor of the kiln. Some of the dishes boiled over with soda. I also sprayed in some soda.
I did some side stoking - just in the last three stoke holes - maybe a total of a large armful of sticks. Next time i will try no side stoking as that tends sto knock over pots.

Reloading the bourry box - pulling on counterweight lid

Next firing I plan to add more mass to the side walls of the pot chamber especially in the front - maybe that will even out the heat from front to back even more.

Roll up ..er down - the Rim

Sisters - in their  Sunday Best - extruded paperclay square coil on inside to thicken rim
Slab built vases always tend to have weak rims unless you make the slabs thick. Since we pay by the pound for firing at our guild I try to use thin slabs but this leaves me with a very thin rim that somehow looks unfinished and weak. I have tried adding extra slab strips to the rim but would get cracking at the joins especially in the corners. Then I started using a soft clay coil so that there was no discernible join in the corners, roughing up the top seam and filling in with extra clay - still some cracking but just in the top seam. I then switched to a soft paper clay coil and that seemed to eliminate the cracks, however I did have trouble getting a crisp edge.

Rolled down rim - punctuates rim
 The best was extruding a length of paper clay using my clay gun and the small square die. "The Sisters - in their Sunday Best" - has got a rim produced that way. As the back was higher, I needed the rim to show crisply on the inside. 
Another method that I tried was rolling and thus compressing the rim with a mini rolling pin - a method that was suggested to me by Steven Hill in one of our journey workshop sessions. That worked for the small handbuilt box but for large pieces as my slab vases it did not result in a sturdy nor thick enough rim for me. Perhaps if the slabs were softer when I rolled them it would have given thicker results.

But for now it's paper clay and a clay gun  for the slab vases.

Thursday, July 1, 2010

Cup Evolution Over Three Years

I have been getting ready to do another wood firing and so was looking at some of the pots that I had kept around from my first firing. One of them was a cup - it was not the glaze that caught my interest this time but the form of the cup itself.  I had made it in 2007. I took some pictures to compare some of my current cups to that 2007 one which is pictured first below.

I remembered what Steven Hill during the journey workshop had told me about cups- the lips and foot are like punctuation marks and should balance. That wood fired cup - definitely no pucntuation on the foot! As well the handle was not pulled on the cup and was rather thick all the way from top to bottom - no sign of a taper to give it some elegance. Now I have been pulling all my handles off the cup - maybe not always successfully but I feel that they are getting better.